Skip to content

Layered Paper Flower Gift Tag

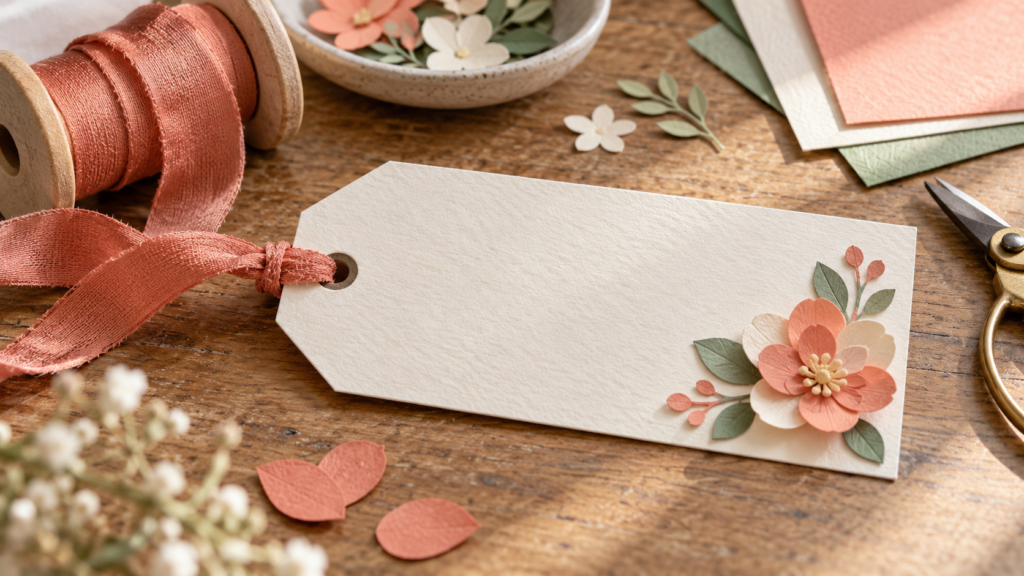
Make a small gift tag with a layered flower near one corner, a clear writing area and a punched hole for ribbon. Keep the flower shallow enough that it does not snag during wrapping.

Size
Tag target: 2 × 3.5 in (5.1 × 8.9 cm); flower size is adjustable.
Cardstock gift tag with a small layered paper flower and ribbon

Materials

  • Cardstock for tag base — Choose a weight that holds its shape.
  • Two contrasting paper colors — For flower petals and center.
  • Ribbon or twine — Cut to the length needed for the package.
  • Adhesive — Use a small amount to keep the tag flat.

Tools

  • Scissors, craft knife or cutting machine — Select the method for the template and paper.
  • Hole punch — Sized for the ribbon or twine.
  • Pencil and ruler — For the tag outline and writing area.
  • Pen — Test on an offcut if the cardstock is coated.

Steps

  1. Set the tag size

    Choose a tag size that fits the package and leaves room for a message. A 2 × 3.5 in outline is a starting point, not a fixed requirement.

  2. Draw a safe writing area

    Mark a central area for the recipient's name or short note. Keep the flower and punched hole clear of that area.

  3. Prepare the flower layers

    Choose a simple petal shape, a smaller center and an optional leaf. Scale the flower so it stays within one corner of the tag.

  4. Cut and assemble

    Cut the tag base and flower pieces. Attach the flower with minimal adhesive, adding only enough layers to create a visible accent without making the tag bulky.

  5. Punch and finish

    Punch a hole near the top edge with enough paper around it to avoid tearing. Add ribbon or twine, then write the message after the adhesive has set.

Plan a gift tag with a paper flower near one corner, a clear writing area and a hole for ribbon. The suggested tag size is 2 × 3.5 in (5.1 × 8.9 cm); adjust it to the package.

Mark the layout

Draw the tag outline and mark the ribbon hole. Leave a central area for a name or short note. Place the flower outside that area so it does not cover the message.

Cut and assemble

Choose a simple petal shape, a smaller center and an optional leaf. Cut a scrap-paper version if you change the tag size. Attach the flower with a small amount of adhesive; thick spacers can make the tag catch on wrapping.

Finish the tag

Leave enough cardstock around the punched hole to prevent tearing. Let the adhesive set, then write the message. Test the pen on an offcut if the cardstock has a coated surface. Add the ribbon last.

This is a layout plan; the time and difficulty have not been measured.
Questions

What size should the flower be on a gift tag?

Keep it small enough to leave a clear writing area and to let the tag sit flat against the package. A scrap-paper mock-up helps check the proportions.

Can I write on the tag after adding the flower?

Yes. Leave the writing area unobstructed and allow the adhesive to set first. Test your pen on a paper offcut if the cardstock is coated.

How do I stop the tag hole from tearing?

Leave enough cardstock between the hole and the outer edge. If the tag is small or the ribbon is heavy, use a wider top margin or reinforce the hole.